

A guide to setting up the Unifi Dream Machine Pro
Background
In a previous blog, I reviewed the UDM Pro. In this blog, I’ll share my experience with setting up a UDM Pro for one of our clients.
Prior to visiting our client’s office, an Internet modem and router were set up. Our client’s objective was to be PCI compliant. PCI DSS (Payment Card Industry Data Security Standard) is a set of conditions meant to confirm that any company that handles credit card information sustains a protected environment. In order to do so, we had to upgrade our client’s current hardware setup with the UDM Pro.
Hardware setup
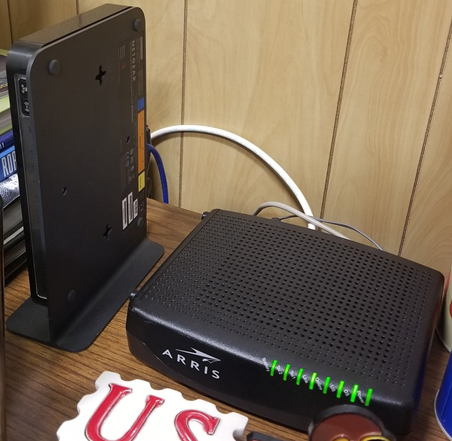
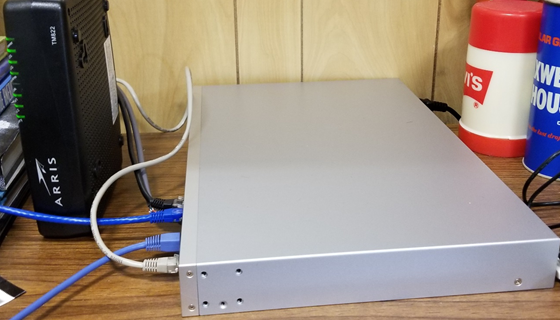
The initial steps required unboxing and installing the equipment. Once plugged into a power outlet, the UDM Pro was ready for use. Given that the UDM Pro also functions as a Router, I disconnected all ethernet cables from the NetGear router to the UDM Pro. More specifically, the Internet cable connecting from the Arris modem was moved from the NetGear router’s Internet port to the UDM Pro’s WAN port. The rest of the ethernet cables from the NetGear router were connected to the UDM Pro’s LAN ports. Moreover, our client’s Front Desk Computer and Credit Card machine were successfully connected to the UDM Pro through an Ethernet Jack wall.
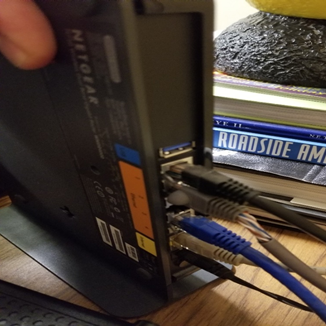
At this point, the only cable connecting to the NetGear router was its own power chord. Basically, I replaced the NetGear router with the UDM Pro.
Initial Configuration
Now that the UDM Pro’s hardware was installed in the office, the following steps involved activating the device through the UniFi Network application. So, I was prompted to install the UniFi Network application on my Android phone from the Google Play Store. Once the UniFi Network app was installed on my phone, I was then prompted to turn on Bluetooth on my phone. This way, the UniFi Network app would scan the environment for any active UniFi device nearby in the means to detect the UDM Pro. For this, I had to ensure there was connection between the UDM Pro and the Office network.
Once the UDM Pro was discovered through the UniFi Network app, I was then prompted to create a name for the UDM Pro device and create a UI.com account by entering a valid email address and a secure password. Make sure you store these credentials as you will need them when connecting to the UDM Pro’s UniFi Network Controller for configuration purposes.
Initial setup- Security configuration
Next, I accessed our client’s desk computer to connect to the web UI at https://unifi.ui.com/dashboard with my UI.com credentials. From UniFi Network Controller settings, multiple sub-settings were modified.
- User Groups settings
- “Guest” user group was created to set bandwidth limit on downloads and uploads under the Guest Wi-Fi.
- Profiles settings
- Switch Ports were configured
- Guest Control settings
- Post-authorization restriction was Enabled to prevent guests from accessing specific hostnames or subnets
- DPI settings
- Deep Packet Inspection and Device Fingerprinting were enabled
- Threat Management settings
- The type of Protection Mode was specified to IPS , Firewall Restrictions were enabled, and Threat Management categories were enabled.
- Routing & Firewall settings
- Firewall Rules for IPv4 and IPv6 were created
- Networks settings
- the LAN Network settings were modified
- Wireless Networks settings
- Wi-Fi networks were created and their settings, including passwords, were modified based on our client’s preferences. In this case, our client requested to have 3 separate Wi-fi networks-for employees, for guests, and for their Workshop room.
- Site settings
- Settings regarding our client’s site were modified
Initial Testing
Once the Internet was re-established on our client’s office through the UDM Pro, I had our client’s staff check the Internet connection on all networks (LAN & Wi-Fi) and devices, including their credit card machine. At this point, the Internet connection was working well in our client’s office.
Additional Hardware setup
Also, I installed an Access Point device on our client’s Workshop room, where he usually has clients of his own.
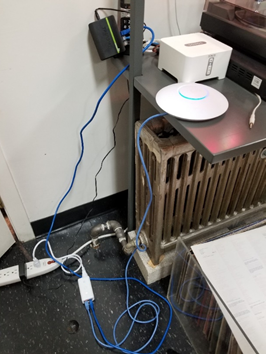
This Access Point would serve to extend Wi-Fi signal from our client’s office, where the UDM Pro was installed, to the Workshop room, where a Soho device was already set up via LAN ethernet cables. These LAN ethernet cables connected from the UDM Pro through an Ethernet wall jack that reached the Workshop room. I had to use the very same LAN ethernet cables to connect the Access Point’s adapter to the UDM Pro. This meant that the Soho device was left without LAN ethernet cables and I had to reset the Soho device with Wi-fi connectivity.
New setup- Security Configuration
A week after the UDM Pro installation, we had a conference call with our client. Prior to the conference call, we created a VLAN network specifically for our client’s Front Desk computer and credit card machine. With the assigned VLAN, other network users and outside users won’t be able to access nor affect traffic roaming through the credit card machine and Front Desk computer.
Final Testing
During our conference call, we had our client confirm the ethernet cables that connected the Front Desk computer and credit card machine with the UDM Pro. Afterwards, we had our client unplug and re-plug the ethernet cables to both devices.
By this point, our client mentioned that there was no longer any Internet connection on both devices. We then had our client restart both devices, however, the devices weren’t assigned different IP addresses. Our client would then reveal that his Internet Service Provider had static IP addresses for his business.
After removing the static IP addresses from our client’s server, which is also the Front Desk computer, we instructed our client to restart both devices. Once the Front Desk computer and credit card machine restarted, they were assigned new IP addresses under the newly created VLAN. Again, we had our client test the Internet connection on both devices as well as the Point of Sales software that communicates to the credit card machine and the printer used for receipts. This time, our client confirmed that the Internet was indeed working on all devices.
Conclusion
Our client’s aim was for his business to be PCI compliant. For this, his current Office setup had to be replaced with the UDM Pro. Installing the UDM Pro allowed for our client’s business to have a Firewall set up, to have multiple and separated networks (including VLANs), to have control over bandwidth and traffic across networks, and to have remote agents installed on computers to see about any issues.